
Shrimp Pond Preparation: Chlorine Disinfection Protocol
- Internal news
- NEWS
- 09/10/2026
Proper shrimp pond preparation is the most effective way to prevent disease before the first post-larvae ever touch the water. This guide walks you through a complete chlorine disinfection protocol: drying and cleaning the pond bottom, calculating the right chlorine dose in ppm, neutralizing residual chlorine, and confirming that your pond is truly safe to stock.
A shrimp crop is often won or lost before stocking day. Pathogens such as Vibrio, white spot virus carriers, and organic sludge left over from the previous cycle can turn a promising pond into an expensive failure within weeks. With global demand for farmed shrimp continuing to rise, as covered in Global Shrimp Market Outlook: A Golden Opportunity for Asia, farms that control risk at the preparation stage gain a real competitive edge.
This article explains how to prepare a shrimp pond before stocking, with a practical chlorine disinfection protocol that you can adapt to your own farm size, water source, and local regulations.
What Is Shrimp Pond Preparation? (Quick Answer)
Shrimp pond preparation is the set of steps a farm completes between two crops to remove pathogens, toxic waste, and unwanted animals, and to rebuild stable water and soil conditions. A standard sequence is: drain, dry, remove sludge, till and lime the soil, fill with filtered water, disinfect with chlorine, neutralize the residual, and build a healthy plankton bloom before stocking.
In short, the seven core steps are:
- Drain the pond and remove sludge.
- Dry and till the pond bottom.
- Repair dikes, screens, and equipment.
- Apply lime to correct soil pH.
- Fill with filtered water.
- Disinfect with calcium hypochlorite and let the chlorine dissipate.
- Fertilize, stabilize water quality, test, and stock.
Why Shrimp Pond Preparation and Chlorine Disinfection Matter
Shrimp live in direct contact with pond soil and water for months. Anything that survives between crops is waiting for the stress of the next cycle to multiply. The main threats that preparation is designed to eliminate include:
- Pathogenic bacteria such as Vibrio species, which thrive in organic-rich sediment.
- Disease carriers such as wild crabs, small crustaceans, and fish that enter through intake water and can carry viruses.
- Organic sludge that releases ammonia, nitrite, and hydrogen sulfide.
- Algae and unwanted plankton that cause sudden oxygen swings and pH crashes.
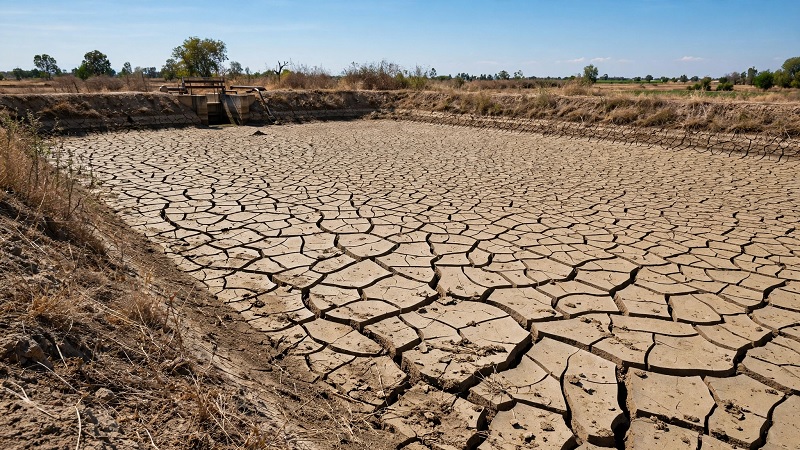
A dried, cracked pond bottom is the foundation of effective shrimp pond preparation.
Chlorine disinfection is widely used because it is fast, broad-spectrum, and leaves no long-term residue once it breaks down. It kills bacteria and many disease carriers in the water in a single treatment, which is why it appears in almost every professional pond preparation protocol.
Shrimp Pond Preparation Step 1: Drain, Dry and Clean the Pond Bottom
Drain and remove sludge
After harvest, drain the pond completely. Remove the black, foul-smelling sludge from the feeding zone and the center of the pond, and dispose of it away from the intake canal. Sludge is rich in organic matter, and organic matter consumes chlorine. If you skip this step, you will need far more disinfectant and still get poorer results.
Dry the pond bottom
Let the bottom dry in the sun until it cracks. Depending on weather and soil type, this usually takes two to four weeks. Sunlight and drying oxidize organic matter and reduce many pathogens. Avoid shortcuts: a wet, muddy bottom hides pathogens and produces toxic gases once flooded again.
Till and level the soil
Once the surface is dry, till the top 10 to 20 cm to expose deeper layers to air. Level the bottom so that water drains evenly and no low spots trap waste during the next crop.
Shrimp Pond Preparation Step 2: Repair Infrastructure and Apply Lime
While the pond is dry, inspect and repair everything that water or animals pass through:
- Fix dike leaks and erosion.
- Replace torn intake and outlet screens, and prepare fine-mesh filter bags.
- Install crab fencing and bird protection.
- Service aerators, paddlewheels, and pumps.
Next, apply lime according to your soil pH. Acidic soils (pH below about 6.5) usually need agricultural lime or dolomite to raise pH and buffer the water. Lime is applied to the dry bottom, not mixed with chlorine in the water, so treat it as a separate step. Follow local soil test recommendations for exact rates.
Chlorine Disinfection Protocol for Shrimp Ponds: Why Calcium Hypochlorite?
Several chlorine products are used in aquaculture, but granular calcium hypochlorite is a popular choice because it is concentrated, stable when stored dry, and easy to dose. Compared with liquid sodium hypochlorite, it carries far more active chlorine per kilogram, which reduces transport and storage volume for large farms.
For farms looking for a reliable source, Vi Chlorine is a calcium hypochlorite Ca(OCl)₂ product with a minimum of 70% active chlorine. It comes as small white flakes that dissolve quickly in water, which helps you spread the disinfectant evenly across a pond, and it is manufactured by Viet Tri Chemical JSC for export through VIETCHEM. Because the active chlorine content is consistent from batch to batch, your dosage calculations stay accurate from one crop to the next.
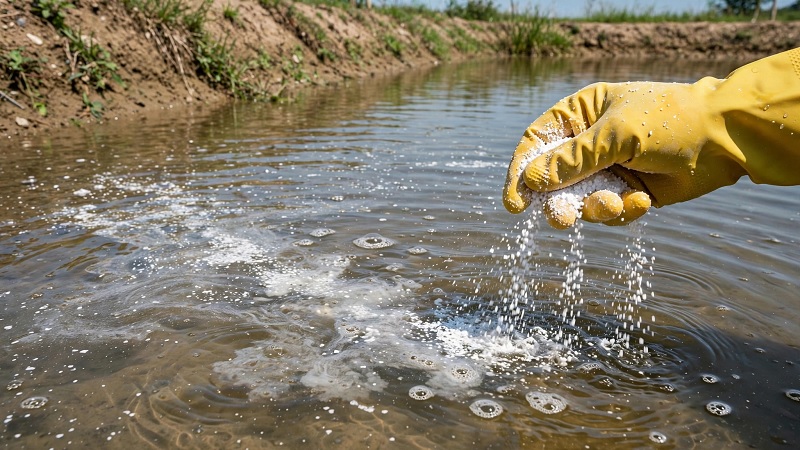
How Much Chlorine Is Needed for Shrimp Pond Disinfection?
The right dose depends on water quality, turbidity, organic load, and local regulations. Many farms work in a range of roughly 10 to 30 ppm of active chlorine, using the higher end when water is turbid or the pond has a heavy organic load. Always run a small jar test first, and check your national or provincial rules on chemical use.
Because the product contains 70% active chlorine, you divide the required active chlorine by 0.70 to find the amount of product:
| Target active chlorine | Product needed per 1,000 m³ (70% calcium hypochlorite) |
|---|---|
| 10 ppm | about 14.3 kg |
| 20 ppm | about 28.6 kg |
| 30 ppm | about 42.9 kg |
Worked example: A 1-hectare pond filled to 1.2 m holds 12,000 m³ of water. At 30 ppm, you need about 12 × 42.9 = 515 kg of 70% calcium hypochlorite. That is roughly 21 bags of Vi chlorine 25kg for easy handling in smaller ponds and on narrow dikes.
Remember that these figures are a starting point. Water with high turbidity, plankton, or dissolved organic matter has a higher chlorine demand, meaning part of the chlorine is used up before it reaches pathogens.
Step-by-Step Chlorine Disinfection Protocol for Your Shrimp Pond
- Fill the pond through fine filters. Use filter bags to keep out wild fish, crabs, and eggs. Fill to the working depth you plan to disinfect.
- Check pH. Chlorine works best in neutral to slightly alkaline water. As pH rises, a smaller share of the chlorine exists as hypochlorous acid, the most powerful disinfecting form. Aim for pH below about 8.5 and adjust if needed.
- Calculate the dose. Use the table above and adjust using your jar test.
- Pre-dissolve the product. Add granules to a bucket of water, never the other way around, and stir to dissolve.
- Apply evenly. Spread the solution across the pond surface from a boat or along the dikes. Run paddlewheels to mix the water thoroughly.
- Hold for 24 to 48 hours. Keep aerators running so that chlorine reaches every corner, including shallow edges.
- Let the chlorine dissipate. Continue aeration and let sunlight break down the residual. This commonly takes five to seven days.
- Test for residual chlorine. Use a chlorine test kit. The reading must be zero before you move on.
Safety when handling calcium hypochlorite
Calcium hypochlorite is a strong oxidizer. Wear gloves, goggles, a mask or respirator, and long sleeves. Store it dry, sealed, and away from sunlight. Keep it separate from fuel, oils, acids, and ammonia-based fertilizers, and never mix it with other chemicals. If it contacts skin or eyes, rinse immediately with plenty of water.
Dechlorination and Safety Checks in Shrimp Pond Preparation
Shrimp post-larvae are extremely sensitive to residual chlorine. Stocking too early is one of the most common causes of mass mortality in the first days of a crop.
To confirm that your pond is safe:
- Test with a kit. Residual chlorine must read zero.
- Speed up removal if needed. Strong aeration and sunlight remove chlorine naturally. If you must shorten the waiting time, a neutralizer such as sodium thiosulfate can be used, with the dose confirmed by repeated testing.
- Run a bioassay. Place a small number of healthy post-larvae in a bucket or hapa net with pond water and watch them for 24 to 48 hours. If they behave normally and survive, the water is safe.
Shrimp Pond Preparation Step 3: Build Healthy Water Before Stocking
Disinfected water is clean but empty. Shrimp need stable, biologically active water to feed, molt, and grow. After dechlorination, fertilize to encourage a balanced plankton bloom, and consider adding beneficial probiotics to help beneficial bacteria colonize the pond before pathogens can return.
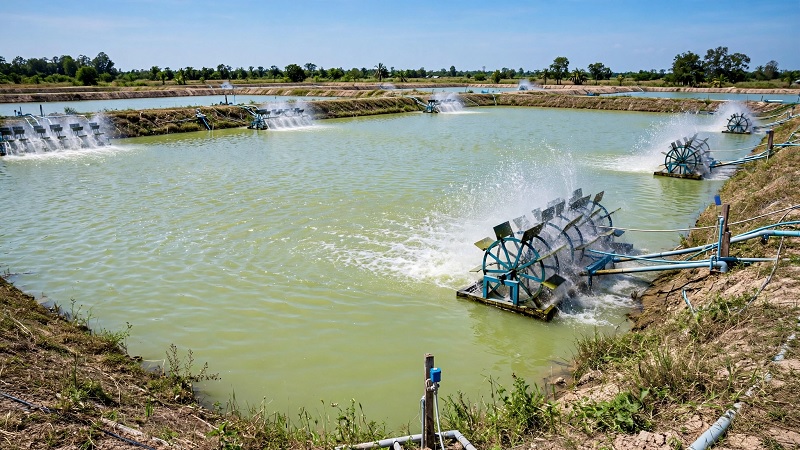
As a general reference for Litopenaeus vannamei, check these parameters before stocking, and always follow your hatchery's and local technical standards:
| Parameter | Typical target |
|---|---|
| Residual chlorine | 0 mg/L (not detectable) |
| pH | 7.5 to 8.5 |
| Dissolved oxygen | 5 mg/L or higher |
| Alkalinity | 100 to 150 mg/L |
| Temperature | 28 to 32 °C |
| Transparency | 30 to 40 cm |
| Ammonia (TAN) | below 0.5 mg/L |
| Hydrogen sulfide | not detectable |
Biosecurity After Shrimp Pond Disinfection
Disinfection is only one layer of protection. Once the pond is clean, keep it that way. Maintain crab fencing and bird nets, filter all incoming water, disinfect nets, tools, and boots, and limit visitors. Treating intake or reservoir water before it enters your grow-out ponds adds another safeguard.
Industry partners are increasingly focused on this whole-farm approach. A good example is the cooperation described in AQUADELTA - Dr.Tom Accompanies Vietshrimp: Vi-CHLORiNE Solution Enhancing Biosecurity in Aquaculture, which shows how disinfection fits into a broader biosecurity program.
Common Mistakes in Shrimp Pond Preparation
- Skipping the drying period. Wet sludge protects pathogens and consumes chlorine.
- Guessing the dose. Too little chlorine leaves pathogens alive; too much wastes money and prolongs the waiting time.
- Chlorinating turbid water. Settle or filter water first to lower chlorine demand.
- Stocking before residual chlorine reaches zero. Always test, and use a bioassay when in doubt.
- Ignoring intake water. Clean ponds can be re-contaminated through unfiltered water.
- Poor safety practice. Mixing chemicals or handling chlorine without protection is dangerous.
Planning Your Chlorine Supply for Shrimp Pond Preparation
Large farms and farm groups prepare many ponds in the same window, so a reliable chlorine supply is essential. Calculate your total volume, add a safety margin for ponds that need a higher dose, and order early so that preparation is never delayed. For multi-pond operations, Vi chlorine 45kg packs reduce the number of bags to move and open, saving labor on the farm.
Before committing, it also helps to hear from people who use it every day. You can read What Do Local Farmers Say About Vi-CHLORiNE for practical feedback from shrimp farmers in the field.
Conclusion: A Clean Start Protects the Whole Crop
Good shrimp pond preparation is a sequence, not a single treatment. Drain and dry the pond, remove sludge, lime the soil, fill through fine filters, disinfect with the correct chlorine dose, confirm that residual chlorine is zero, and build stable water before stocking. Each step protects the next, and together they give your post-larvae the cleanest possible start.
Need Calcium Hypochlorite 70% for Your Shrimp Farm?
Get a quote, product specifications, and export support from our team. Available 24/7 on WhatsApp: (+84) 981 370 389 or email telesales@vi-chlorine.com.
Request a Quote NowFAQ: Shrimp Pond Preparation
1. What is shrimp pond preparation and why is it important?
Shrimp pond preparation is the process of draining, drying, cleaning, liming, filling, and disinfecting a pond before stocking. It removes pathogens, organic sludge, and disease carriers, which lowers the risk of outbreaks and improves survival, growth, and feed conversion throughout the crop.
2. How long does shrimp pond preparation take?
Most farms need about four to six weeks from harvest to stocking. Drying the bottom takes two to four weeks, filling and chlorine disinfection take about one week, and the chlorine dissipation and water stabilization phase takes another one to two weeks, depending on weather and water quality.
3. How much chlorine do I need to disinfect a shrimp pond?
Many farms use roughly 10 to 30 ppm of active chlorine. With 70% calcium hypochlorite, that equals about 14 to 43 kg of product per 1,000 m³ of water. The exact dose depends on turbidity and organic load, so run a jar test and follow local regulations.
4. How long should I wait to stock shrimp after using chlorine?
Wait until residual chlorine tests at zero, which commonly takes five to seven days with aeration and sunlight. Then confirm with a 24 to 48 hour bioassay using a few post-larvae before stocking the full pond.
5. What water quality should I check before stocking shrimp?
Check residual chlorine (zero), pH (about 7.5 to 8.5), dissolved oxygen (5 mg/L or higher), alkalinity (100 to 150 mg/L), temperature, transparency, and ammonia and hydrogen sulfide levels. Match these values to your hatchery's acclimation conditions to reduce stocking stress.